
A few months ago, Securex announced a Do-It-Yourself Home Security Kit which can be purchased from their online market place. There major selling factors of this Kit are the price, the fact that you can set it up yourself, and the fact that you can slowly build on home security by later on adding more to the kit including cameras and much more.
In this article we are going to see how you will setup your Rafiki by Securex Home Kit once you receive it. In the first article we already talked about what’s in the box. If you don’t remember all that, below is a quick refresher.
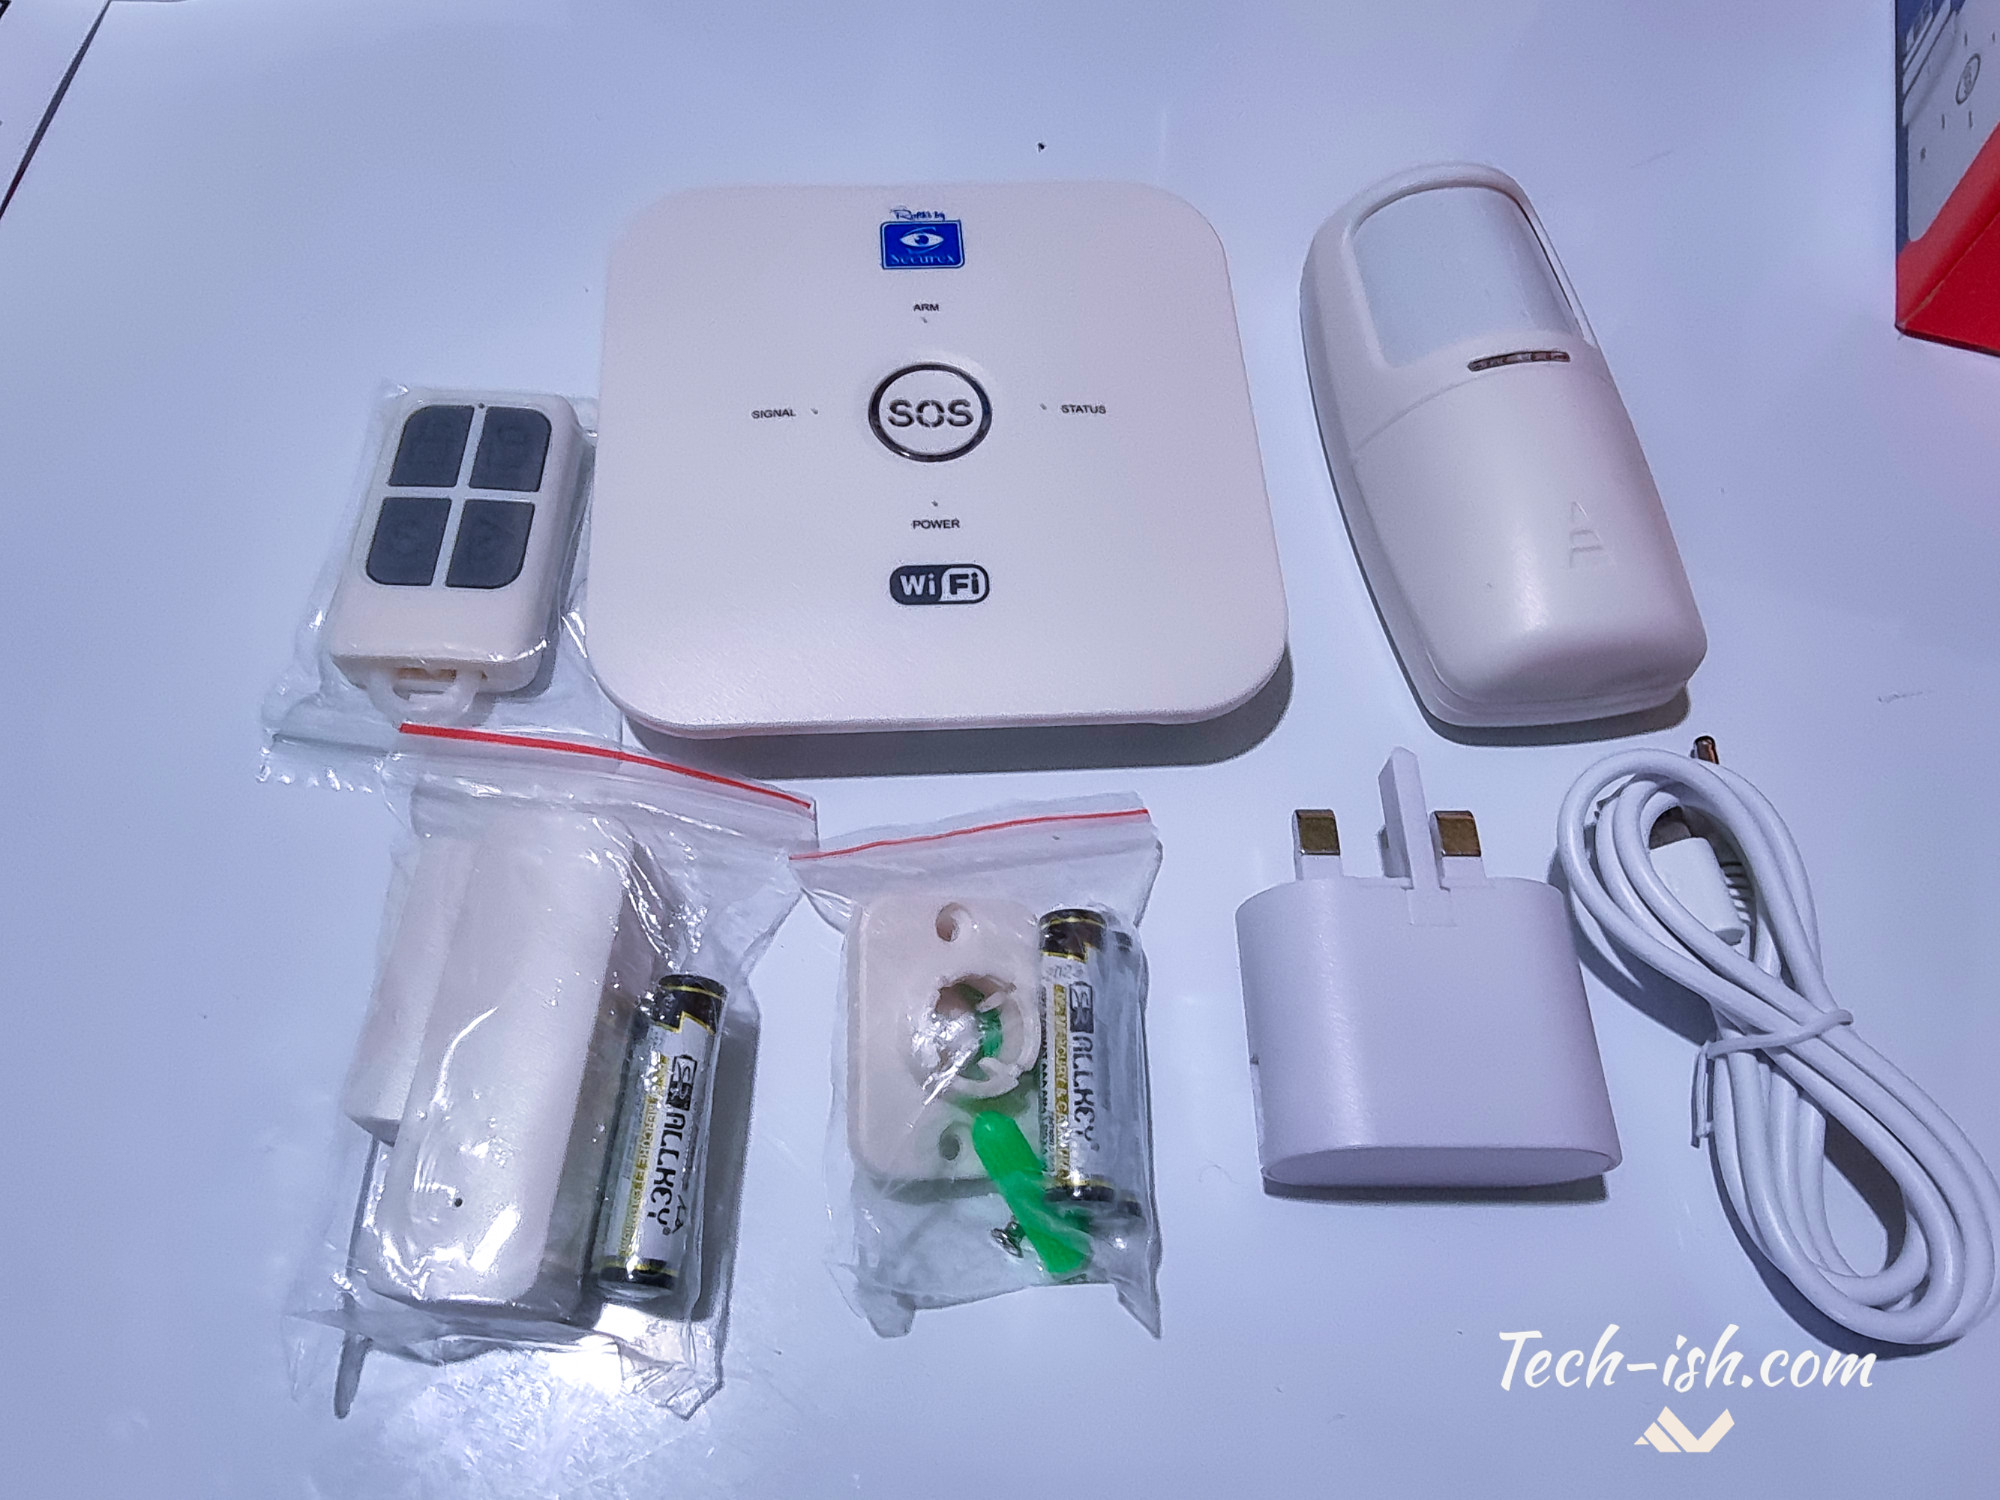
Here’s what you get in the box:
Base Station/WiFi Alarm Panel:
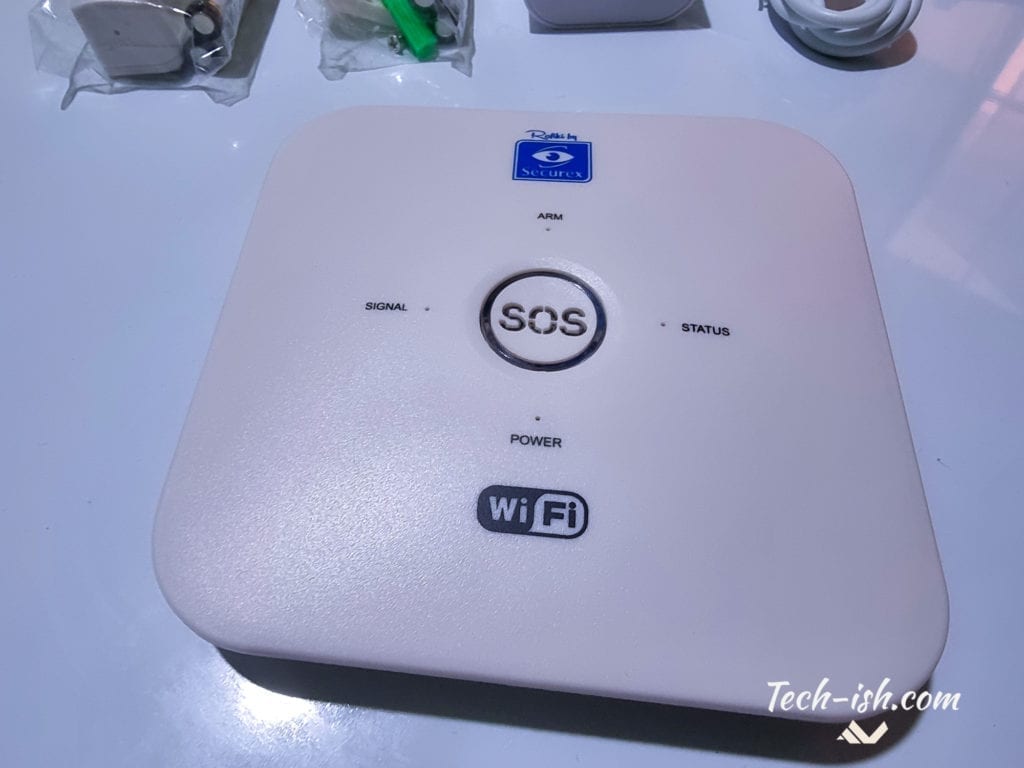
This is the Gateway that allows you to connect to numerous different sensors and accessories. These include the three accessories bundled with the kit, plus many other Rafiki-compatible accessories which you can buy from the market place.
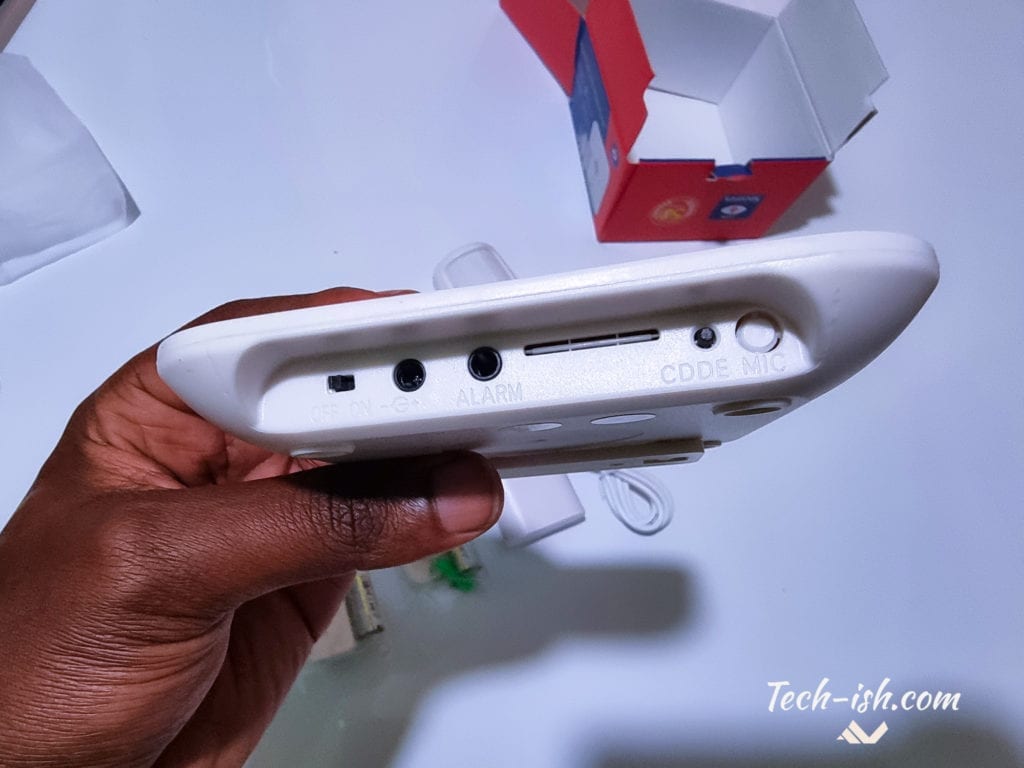
PIR Motion Sensor

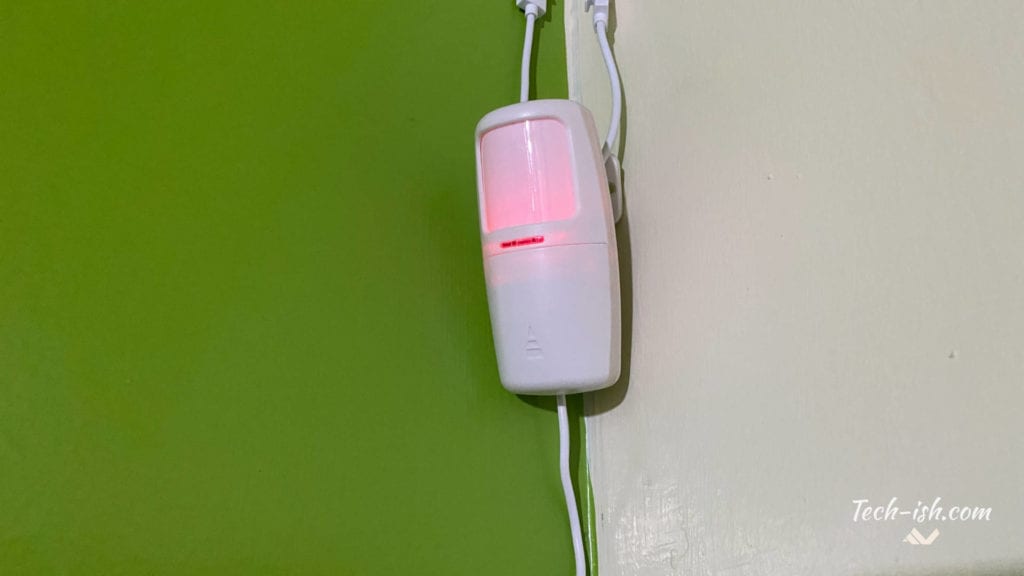
This Passive Infra-Red Motion Wireless Sensor is an accessory you set up in whatever room or pathway where you want to be notified in case there’s a motion when there shouldn’t be. It is powered by a pair of AAA batteries and will detect moving heat waves emitted by people moving within the region in the room you put it in and share data with the Base Station.
Magnetic Contacts
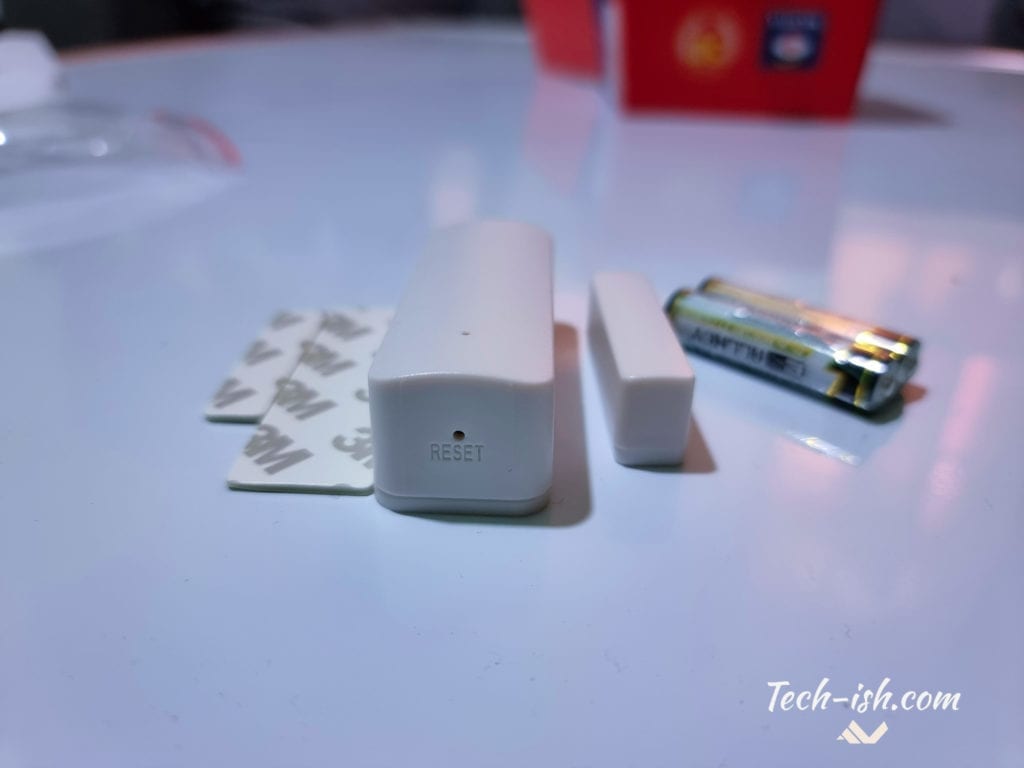
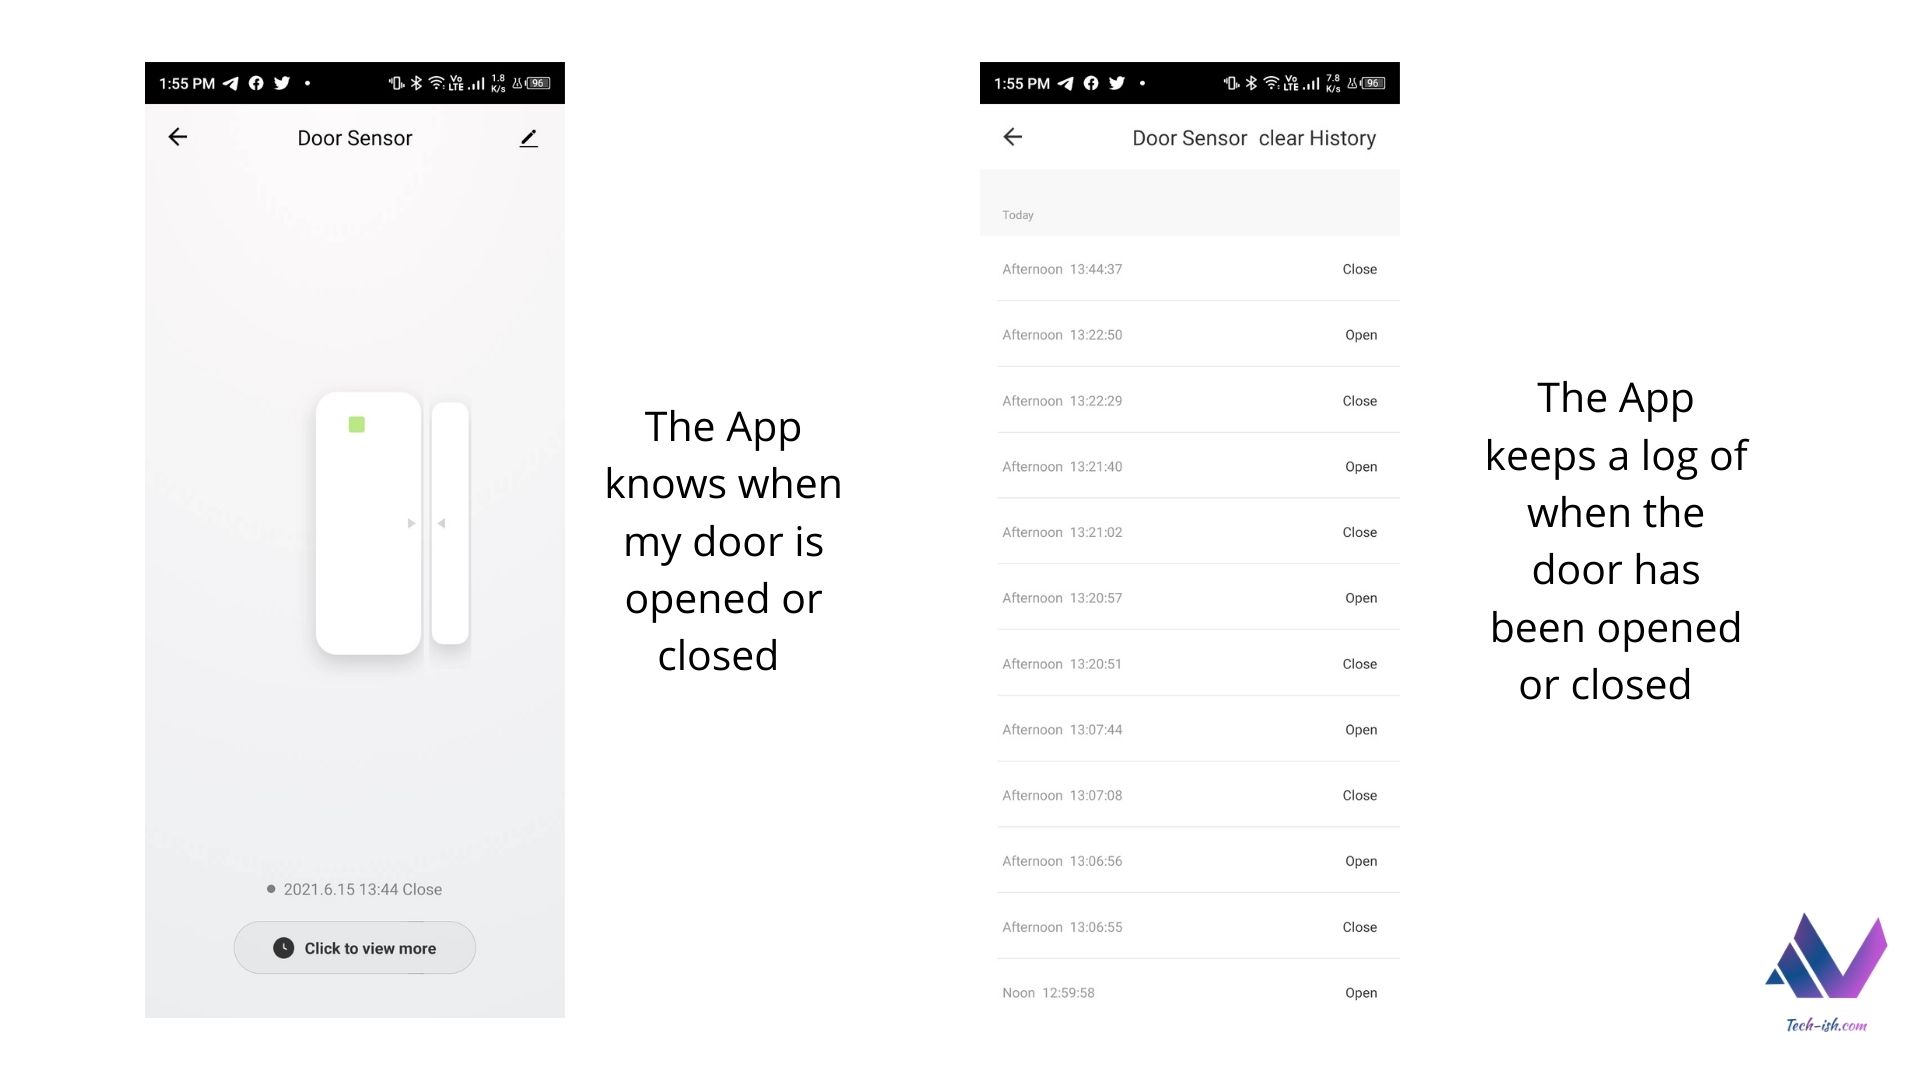
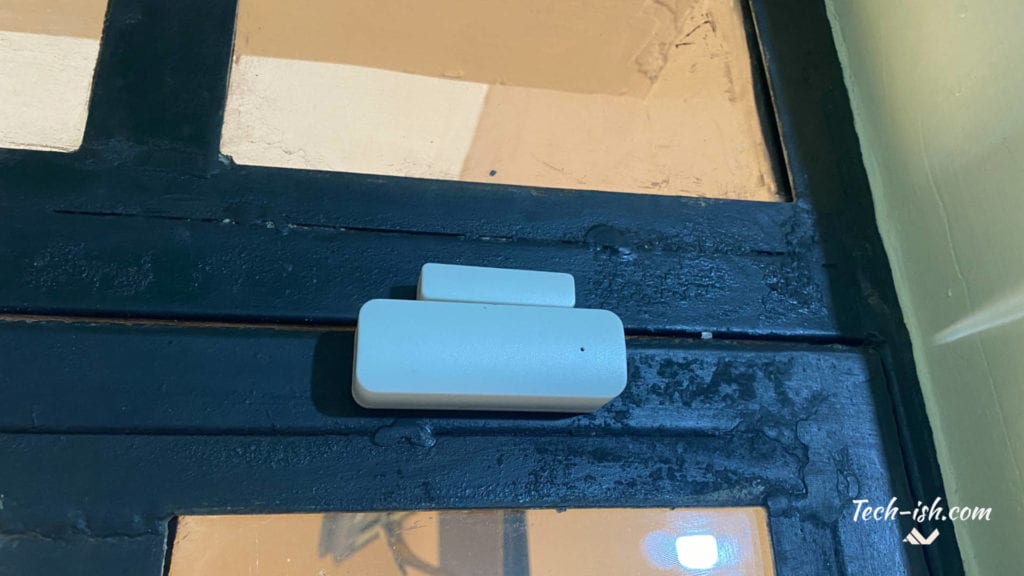
These Contact Sensors are for doors or Windows. They are also wireless, and you place a pair of AAA batteries on the big Contact then attach it to the non-moving part of a window or door. The other small Contact is attached to the moving door or window. When the window or door is closed, the two should touch. The magnetic contacts share data to the Base Station to tell it whether the Window or Door where there’ve been placed is open or closed.
Make tech-ish your favourite news source
Star tech-ish.com on Google. We move up your daily feed.
Remote Control
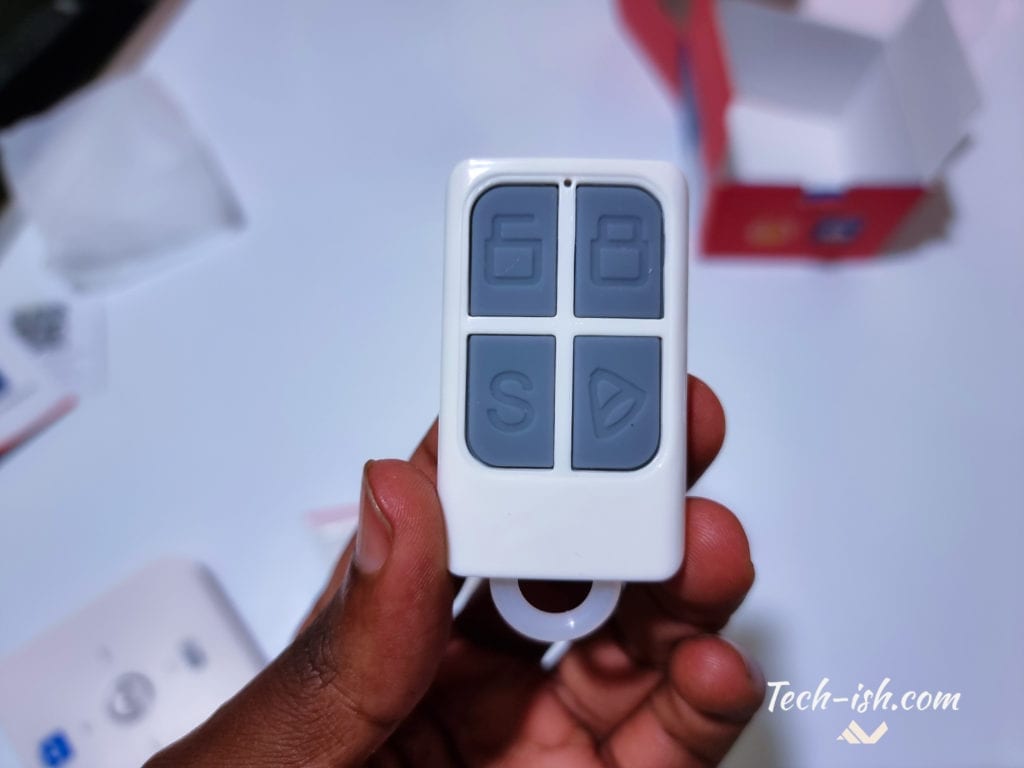
This is the Scenario Switch that allows you to quickly set the Base Station to either Armed or Disarmed. There are four buttons: One for Disarming, the second one for Arming, the third one for Emergency, and the other for telling the System you’re home.
QR Code

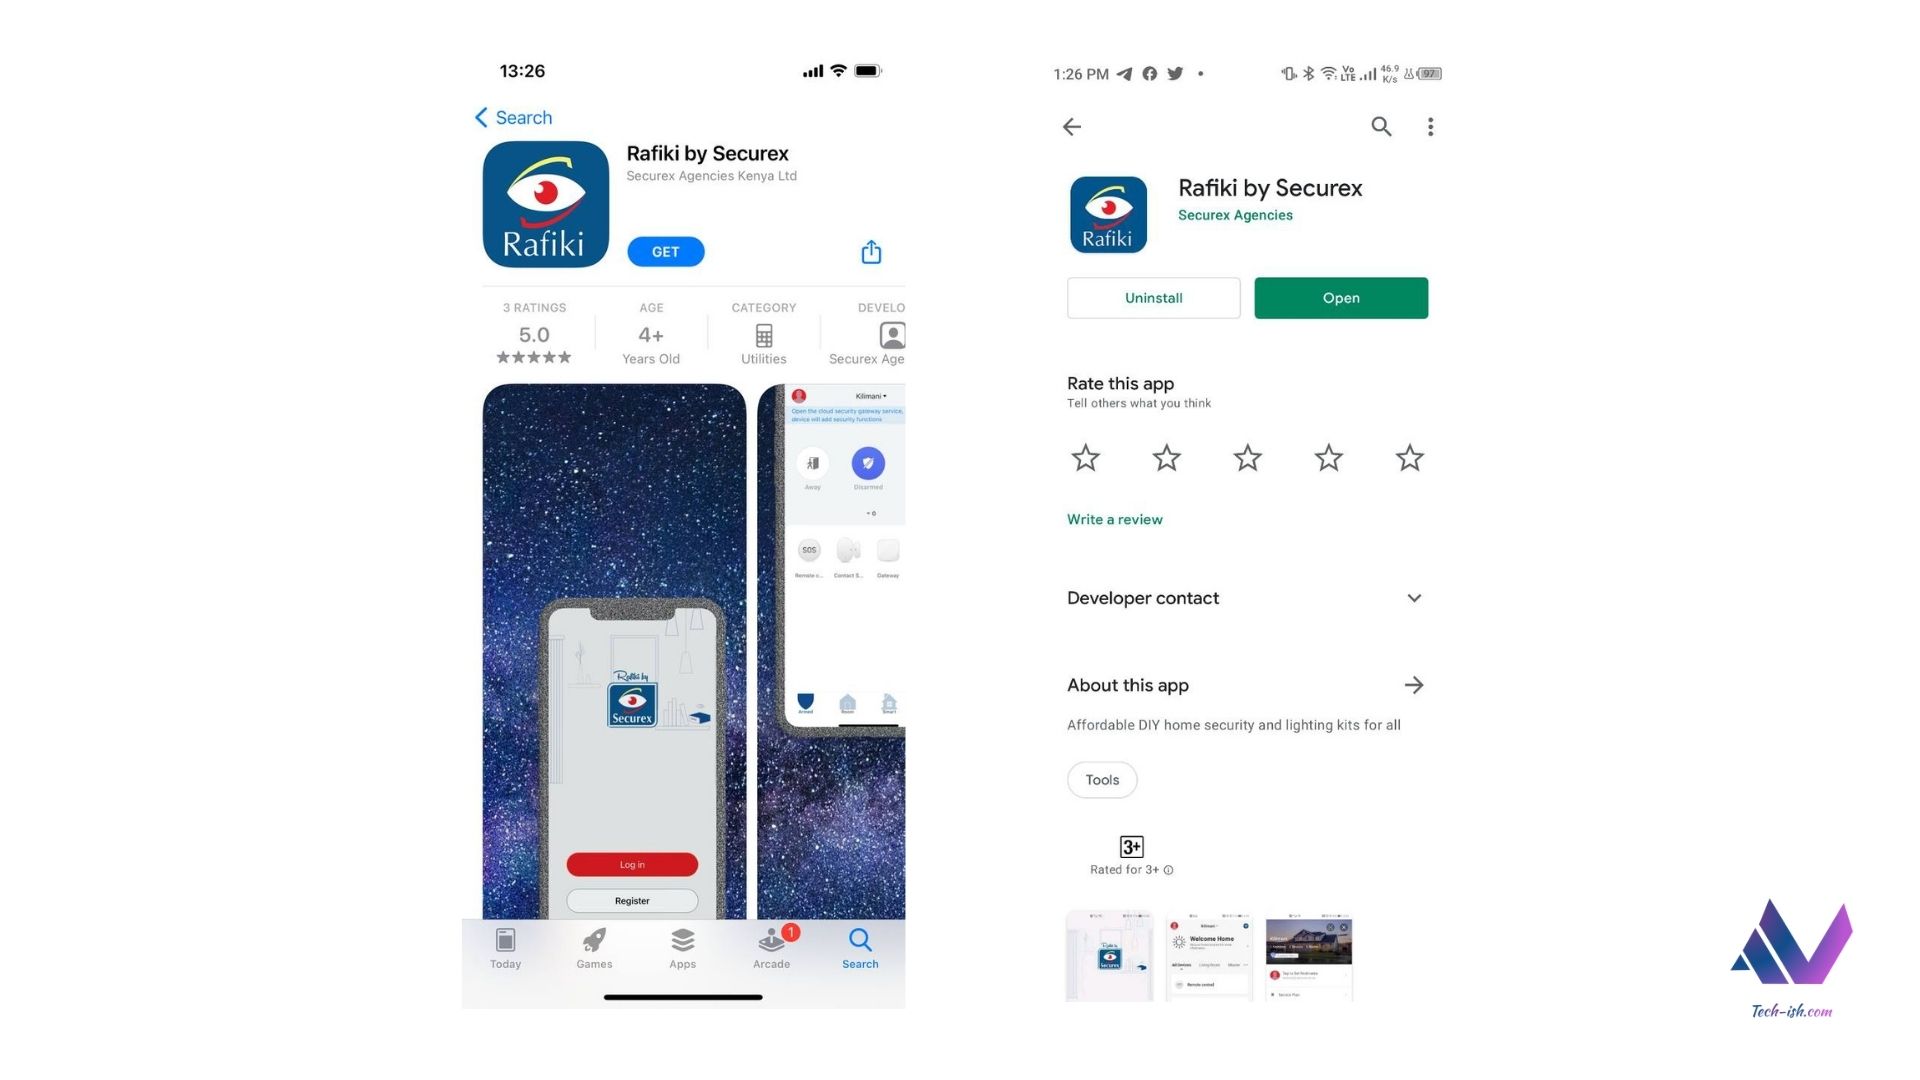
This is for you to scan and get a link to download and install the companion app on your Android or iOS device. Of course, you need the app on your phone to set all these up.
Next:
Now that we know everything that’s in the box, let’s go about pairing everything to the Base Station/WiFi alarm panel, because that’s the main connector for everything else. Whenever you will need to upgrade, you will have to connect every extra accessory you buy to this Base Station.
How to setup Rafiki by Securex:
- Remove everything from the box and set it up such that you know what is what as described in the list above.
- Identify the places in your house where you want to place the PIR Motion sensor, and the the Magnetic contacts. You could also buy more of these, including a camera if you have a bigger house, or more doors/pathways.
- Get your smartphone and scan the QR Code so as to get the link to download and install the companion app. This is very important, as you can only operate everything in the box through that app. You can also just go to Google Play Store and download Rafiki by Securex app. If you use an iPhone, get it from the App Store.
- Once downloaded, you will need to sign up within the app, fill all the necessary details including country, and email address.
- Thereafter you will need to set a location where the Rafiki kit will sit at.
- While setting location you will need to enter Location Name e.g. HOME, or whatever you feel like, then Location Address – if you’ll be paying the monthly fee for Securex to respond to you incase of an emergency.
- You will the choose the rooms in your house where you will be placing the different sensors
- Once that is done, you will need to add the Base Station/WiFi Alarm panel to the app first. This is because everything else connects to the Base Station.
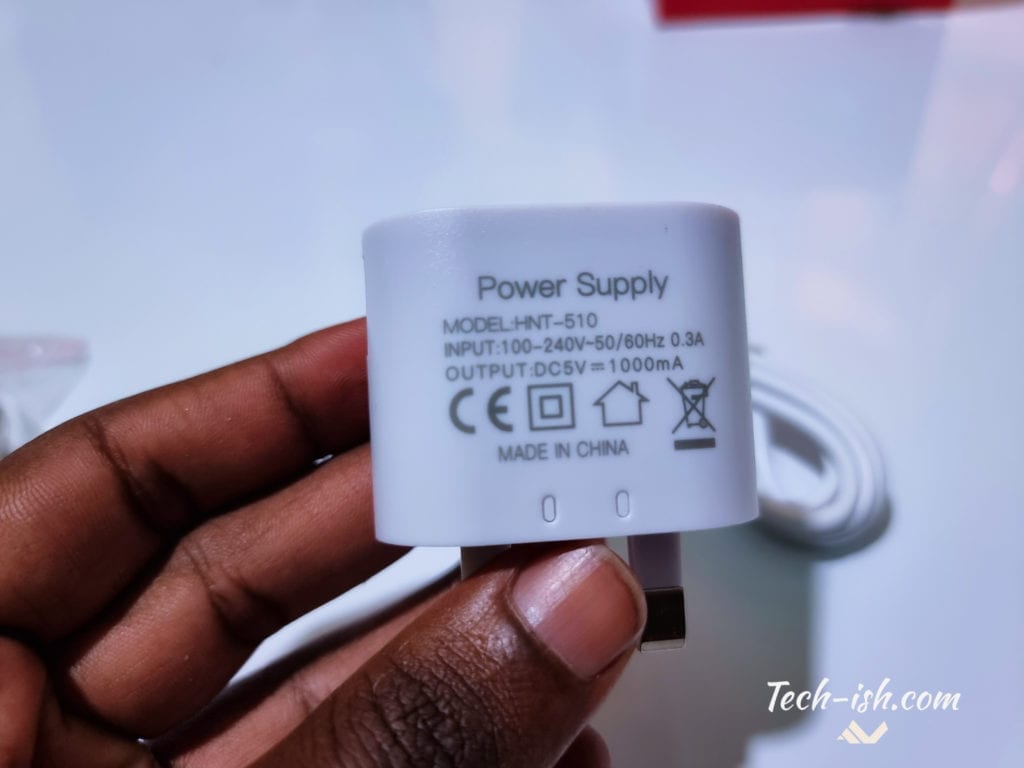
- To add the Base Station, click on ‘Add a device’, then select ‘Base Station (Wi-Fi)‘, then set it up by following the instructions. The Base Station needs to be turned on using the adapter included in the box.
- Once that’s set up, you will then add to the Base Station the Magnetic Contacts (which are called ‘Contact Sensor (WiFi)‘) within the app. You will need to add to the bigger Magnetic Contact two AAA batteries to turn it on, so that they’re detectable.

- Once these are added, you can place them on the door in your house which you had selected in Step 2 above.
- To place a pair of magnetic sensors on a door/window, use the included double-sided 3M tape and stick one end to a non-moving part of the door/window and the other end to the moving part. This is so that when the door/window is open, the sensors know they’ve been shifted and send an alert.
- To know you’ve properly setup the sensors, there’s a red light blinking on the bigger sensor when the two come in contact. Ensure you place them in a way that the lights come on when they’re in contact.
- Now you need to now add the PIR Motion sensor to the Base Station. To do this, first insert two AAA batteries to the sensor and turn it on. Then within the app add the sensor that’s marked as ‘Motion Detector (Wi-Fi)‘.
- Once the motion sensor is set up, place it in the room/doorway where you want it to detect any movements.
- The next part is adding the remote. Go to add device, scroll down to MORE and then to OTHERS and select ‘Universal Remote Control‘. This will pair to your base station and allow you to quickly arm, disarm your house, or sound the alarm incase of intrusion.
- You can then add the remote to your keys or anywhere you will quickly access it.
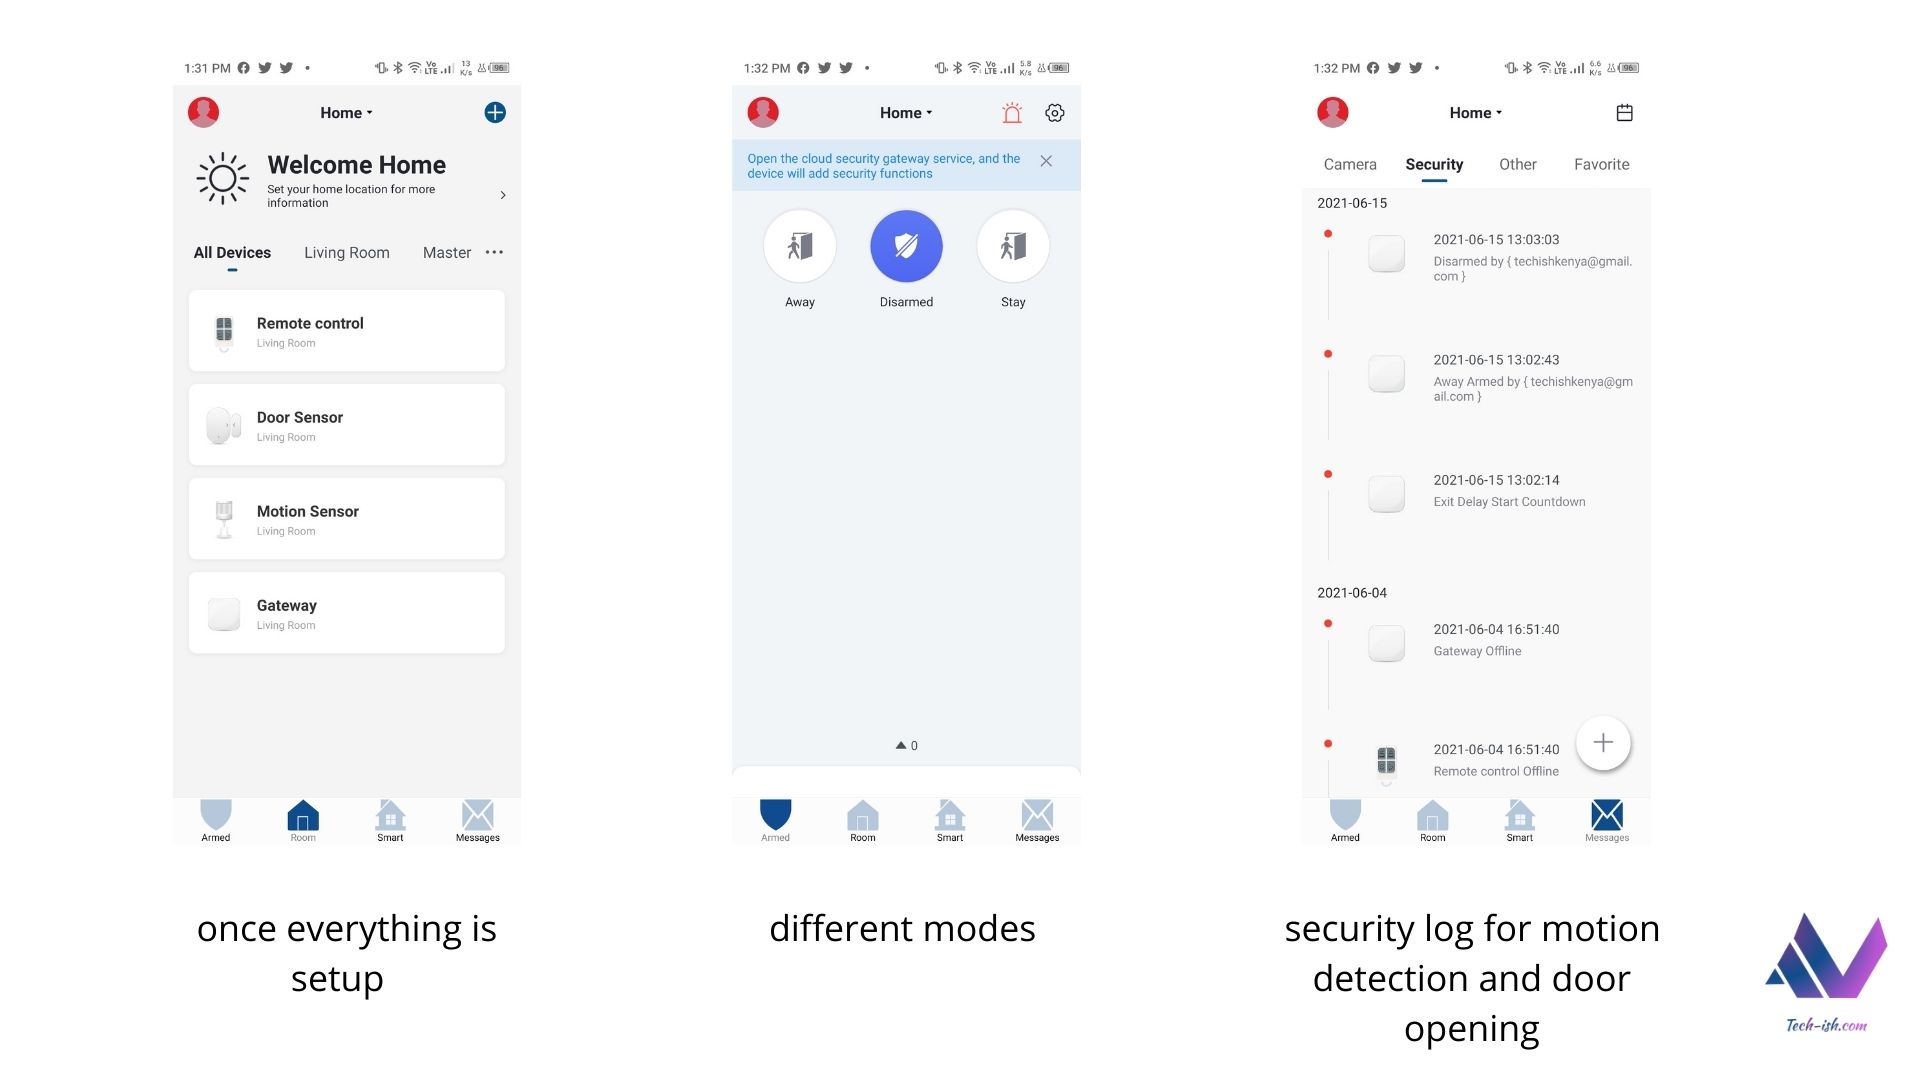
Once everything is setup and placed in its rightful place, you’re all good to go. And can now use the alarm system. When armed, whenever motion is detected by the PIR Sensor, or whenever a door/window where the magnetic contacts are setup is moved, you will get a notification and then the alarm will go off. That’s how it works, basically.
There are three different modes within the app: Armed, Disarmed and Stay. When ARMED, the alarm will go off whenever door/window is opened or when motion is detected. When DISARMED, nothing will happen. Under the STAY mode, you can enable some motion sensors or cameras to notify you incase of any activity.

Magnetic sensors on my door PIR Sensor on my wall
And that’s it for setting up your home security system on your on! Remember, you can after all the processes above, add everything to your Google Home, such that you can use your Google Assistant to make routines, setup periods for arming and disarming, and even actions that happen based on location, or other actions. For example, you can setup that when Google detects you’re out of the house, the system will ARM the house.

You can also pay Securex for plans like:
- Cloud Storage – if you have a camera attached,
- for Alarm monitoring – such that when the alarm goes off, they will send a team to check on your home,
- for Continous Monitoring – where you will need a couple of cameras setup around your home and there will be constant monitoring and saving of data if you want such assurance of security.
Ask whichever questions you have down below, and let me know your thoughts on the whole setup, and check out their marketplace for other accessories you could pair with the Home Kit.


Join the discussion